
 Shop Store
Author Archives: Nadine Reynolds

Should I Paint a Scratch on My Car?
As hard as you try to take care of your car, scratches are seemingly inevitable. Falling tree branches, keys that miss their mark, and bumps from people or luggage can all leave unsightly dings and blemishes on your vehicle. But should you paint a scratch on your car? The Motor Bookstore weighs in below.
The Pros and Cons
The main arguments against painting scratches on a car are that A) it can potentially be expensive and time-consuming, and B) fixing scratches aren’t essential to a car’s performance. After all, if it doesn’t get you where you’re going and faster, then what does it matter? However, we ultimately come out in favor of painting scratches for a few big reasons.
To begin with, even minor scratches will hurt your car’s resale and trade-in value. You may not care about them, but dealerships certainly will. In addition, deep scratches that penetrate the base coat or primer are prime candidates to eventually develop into rust holes. Lastly, many automotive experts agree that scratches can adversely affect your own view of the car – and if you think less of your vehicle, you may be less likely to do important regular maintenance such as oil changes, tire rotations and tune-ups.
Ways to fix scratches
Contrary to popular perception, many minor scratches can be fixed inexpensively in your own garage. Clear coat scratches can often be buffed out in minutes using regular automotive polishing compound, which spreads out the remaining clear coat over the affected area. (Be careful not to overdo it, or you may need to respray some clear coat back on.)
Base coat and primer scratches can take longer to fix, but are far more important to deal with. Many car dealers have touch-up paint or paint pens available for about $10 that do a passable job – just make sure to get the paint code off your vehicle’s compliance plate. You can also do a more professional overnight job using cleaning solvents, matching paint and primer, medium-grade wet sandpaper and polishing compound.
Thinking about doing more work to your vehicle? Check out our other blogs on engine rebuilds and recharging your A/C system.

Restoring a classic car is similar to other major life undertakings such as home remodeling or a big vacation – no matter how much you plan in advance, things can change without notice. The Motor Bookstore is here with tips and advice to make sure your bank account, time, and sanity stay on budget during your next classic car restoration project.
Keep a realistic schedule
A full frame-off classic car restoration can take up 1,500 hours – at least a year of part-time work. Know this going in, and plan your work schedule so you’re never feeling pressured to hit a deadline, as rushing can lead to costly mistakes.
Know your financial budget in advance
Having a target number will help guide every subsequent decision. The standard budget-setting method is to estimate your expenses if things go perfectly, then add at least 30 percent for unexpected costs.
Record your expenses
Keep all receipts for parts and labor, along with a tally of your running total. This tracking acts as a form of self-restraint against impulse buys.
Make a good initial car purchase
Carefully weigh the upfront price against how much various repairs will cost. Avoid cars with rust and missing trim, as these things are the most expensive to fix. Learn as much as possible before buying, and don’t rush your decision.
Do your own dirty work
Read books and manuals, watch DIY videos, talk to friends, and whatever else it takes so you can learn to do as much as possible. Even taking the car apart and cleaning each component on your own can save a lot of money versus what professional labor would cost.
Wait to order
Don’t buy any parts until you’ve fully disassembled the vehicle and cataloged what you need. From there, talk to salvage centers and car collector groups to see what’s available at discounted rates. Another little-known trick is to send a list of parts to various suppliers, and tell them the full order will go to the lowest bidder.
Relax
No matter how carefully you plan, there’ll be hiccups along the way. When they happen, take a deep breath, and remember: this is meant to be fun.
Want to learn more about car restoration? Check out our blogs about how to get your restoration started and what to do if you’re new to car restoration.
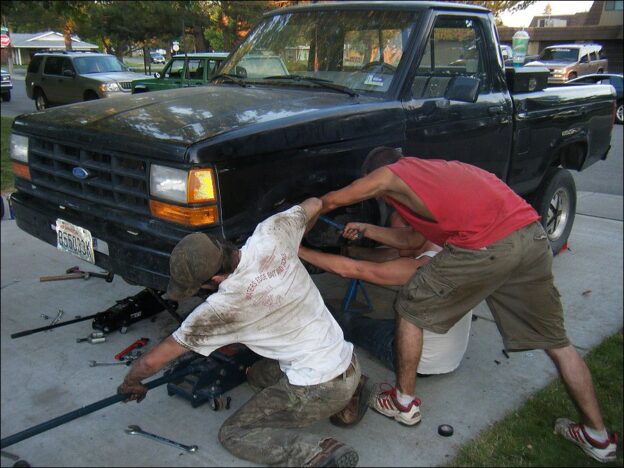
As any car owner quickly learns, car repairs are a fact of life. But The Motor Bookstore doesn’t want you spending a small fortune just to keep your car on the road. That’s why we’ve compiled five ways to save serious money on car repairs the next time you need work done.
1. Do as much of your own work as possible
As long as you have a good vehicle manual and a space to work in, you can learn to do a lot of basic maintenance and repairs. Changing your own oil, filters, tires, fluids, headlights and brakes will save you hundreds of dollars in labor costs while reducing the chances of major failures in the future.
2. Find good repair shops and mechanics
Be selective about who you bring your car to for work. Read reviews, talk to friends, or even visit a shop to see how things work there. Good shops should be ASE certified, clean, have good parts and labor guarantees, and get customers in and out quickly. Getting good work done now will save money later on.
3. Shop around
Even if you’ve found a repair shop you like, feel free to get a second opinion, especially if something seems suspicious. Get estimates that are separated by parts and labor so you can compare prices elsewhere. You can often get big discounts on parts online and also find an estimate of what a repair should cost.
4. Take advantage of warranties
Paying a little more for an extended or lifetime warranty now can pay big dividends if you have to use it. For example, alignment warranties can save you a bundle in the long run, especially if you live an area with heavy traffic or rough roads.
5. Review your bill before paying
Don’t let a repair shop sneak one by you. Make sure you haven’t been double-billed for parts or labor, that the total isn’t way larger than the estimate, and that unneeded repairs aren’t listed. Asking for your old parts back before they begin is a great way to keep things above board.
Looking for more ways to save serious money on car repairs? Check out our blogs on rebuilding an engine on a budget and DIY farm tractor repairs.
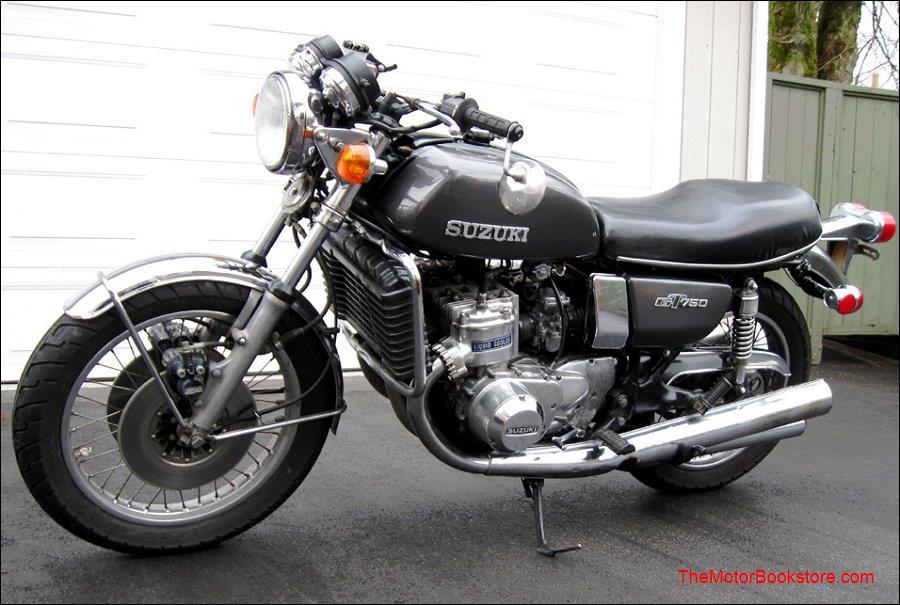
Getting Your Bike Ready For The Winter
When the leaves fall and the temperature drops, it is a sign to start getting your motorcycle ready for the winter. That, of course, means doing a little more than simply parking your motorcycle in an out of the way corner of the garage or pulling a cover over it while it sits in a storage building. Proper motorcycle winter storage goes a long way in giving your bike a long, useful life.
The first step in getting your bike ready for its winter hiatus is reading the maintenance and repair manual. Repair manuals give you valuable tips about maintenance and tune-ups that can be done before storing the bike for the winter. Some of those tips can be found in the next section.
Winter Storage Tips
Here are a few tips for preparing your motorcycle for winter storage:
- Clean and wax the bike. A clean bike keeps grease, oil, dirt and corrosive materials from damaging the paint or parts of you motorcycle.
- Park the bike in such a way that both tires are sitting on wood. If the bike is outside for the winter months, you certainly do not want the rubber sitting on the ground where the tires can rot and crack.
- Drain the oil and flush the crankcase. This keeps corrosive and gumming deposits from building up over the winter months. Replace the oil filter at this time while you are at it so that you can begin the spring with a new oil filter.
- Lubricate the chain or shaft drive to prevent rust from forming. Rust can damage the chain or shaft while the bike is in storage.
- Drain the fuel from the fuel tank and the carburetor. Sediments in gasoline clog fuel lines. Old fuel creates a harmful varnish on and plug up carburetor parts and fuel lines.
- Go over the wiring to check for cracks or breaks in the insulation. Repair or replace the defective wiring right away. Also, be sure and check to make sure all wiring connections are corrosion free and tightly fitted together.
- Disconnect and remove the battery. The battery will discharge during the winter months, and the acid solution in the battery will freeze. This freezing will crack or damage the battery case.
- Clean the battery cable connections. These connections can become glazed during use, but fine steel wool or a battery cleaner will brighten them back up. Once they are cleaned you can coat them with grease to seal them. This grease can be easily removed next spring.
- Check the wear on disc brakes and make sure the brake fluid reservoir is filled.
- Clean or change the air filter.
- Change your insurance policy. Most insurance companies offer special reduced rates for motorcycles that are in winter storage.
Readying Your Bike For The Next Riding Season
Repair manuals give you all of the how-to information that you will need to perform these simple maintenance procedures. You can also check with your dealer for additional information to help you get your bike ready for storage.
Ice and snow may force you to park your bike for a few months, but with a little end of the season maintenance, your bike will be ready to hit the road when spring comes.
Time to start riding again? Read more tips about inspection and repair when taking your bike out of storage in 6 Tips to Prepare Your Motorcycle For Riding Season.
Engine Rebuild Cost Saving Tips
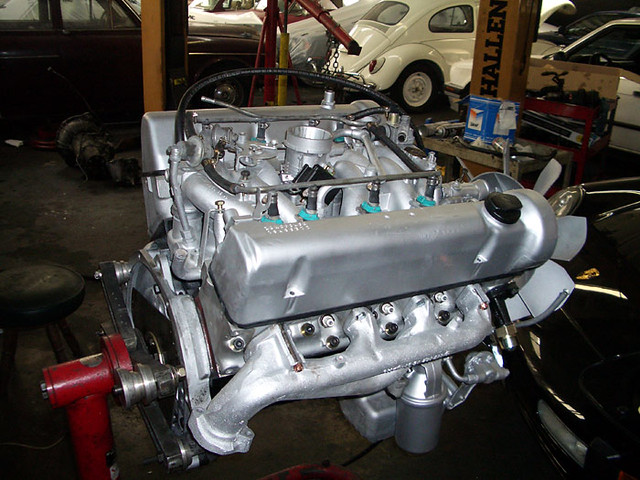
One of the big reasons to rebuild an engine is that, if done right, it can be significantly less expensive than purchasing a new one. If your budget is particularly tight, you’ll be looking to save every penny you can. Following these engine rebuild cost saving tips below will help your dollar go further when you’re working to get your favorite ride back on the road.
Do your research
When you have a limited budget, you can’t afford to throw away money on parts that don’t fit your engine or to make a mistake mid-rebuild. Make sure to do as much research as possible before beginning. Find out your engine’s model, year, displacement, etc. and determine what parts will match. Get an engine building manual as specific as possible to your engine with detailed instructions. And wait to order parts until you’re absolutely certain what you need.
Only replace what needs to be replaced
Why would you replace your block if it’s still in good enough shape to outlast the rest of the engine? If you’re on a budget, well-functioning is as good as new. You should still replace all bearing, seals, gaskets and piston rings as insurance against future failures. But if your deck is still straight, or if your cylinders only need to be honed, then roll with them. (You can also sell or scrap old parts to offset costs.)
Look for used engine parts
There are plenty of used-but-still-good engine parts available from vehicles that were taken off the road for other reasons. Check local junkyards, Craigslist, eBay and other second-hand sellers for these used parts. The seller is admittedly less likely to stand behind these parts with a warranty, so you’ll want to do your homework and inspect the parts for yourself before purchasing.
Prepare parts before bringing them to a shop
If you do need your cylinder heads bored or your deck milled, you may have to bring them to a machine shop. But you can still save money by preparing your parts beforehand. Disassembling and degreasing the engine core yourself is a lot cheaper than paying $75-100/hour for someone else to do it. (And it should go without saying, but make sure to pick a reputable shop that does fast, high-quality work.)
Not sure if you should rebuild your engine? Read more about rebuilding or buying new here: Rebuilding an Engine: What to Consider Before You Begin.
Car Restoration 101: What to Remember Before You Begin

Whether you’re looking to repair a car that was in an accident, fix up a classic ride, or just want to learn more about vehicles, car restoration can be a fun and rewarding pastime. But if you’re new to restorations, the prospect of rebuilding an entire vehicle can seem daunting. This guide will help you get everything in order so your first restoration project goes as smoothly as possible.
Pick the right car
You don’t want your first project to be a total rust-bucket that’s nearly impossible to find parts for – especially if you’re doing this as a hobby. Search the classified ads and Craigslist, talk to local car clubs for leads, and keep an open mind. Make sure to get a car that’s solid, complete and rust-free. If you have a car you’re eyeing, learn as much about it as possible before you buy, including what parts are used. The internet and automotive manuals are a big help for determining what’s needed and what’s available.
Space and Tools
The next most important things are having a good space to work in and good tools to work with. If you don’t personally have an adequate garage, ask around about spaces that can be borrowed or rented inexpensively. Make sure you own basic tools such as screwdrivers, socket and open-end wrenches, drills and sheet metal scissors. Specialized tools such as engine cranes, torches and welders will also need to be purchased or rented.
Get your finances in order
Do extensive research into what parts you will need and how much they’ll cost. Once you have a rough budget, add at least 30 percent to that. If the final number is outside your price range, you may need to postpone your project or pick a different car.
Don’t be in a hurry
A full frame-off car restoration can take anywhere from 1,000 to 1,500 hours to complete. Thinking about it in those terms can be intimidating, so break it down into digestible chunks. Set a rough schedule, but don’t rush to hit a “deadline”, as this can cause critical mistakes that set you back. And take pride in the individual tasks you complete along the way.
What kind of car would you like to restore?
Interested in learning more about car restoration and rebuilding? Read more about it here: How to Learn Car Restoration. This blog post provides tips and resources to help you get started.


Search Our Blog