
 Shop Store
 Google Plus
Author Archives: Mike Hornok

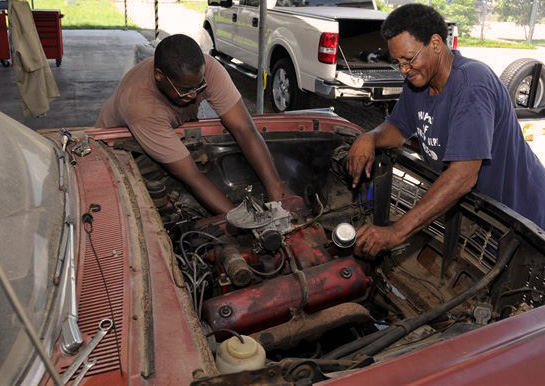
Restoring a classic Ford Galaxie is a labor of love that requires time, patience, and dedication. These beautiful American full-size cars, manufactured from 1959 to 1974, are popular among vintage automobile enthusiasts. However, bringing a Galaxie back to its original glory can present several challenges. In this comprehensive guide, we’ll explore the most common hurdles faced during the restoration process and offer practical solutions to help you navigate your way to a beautifully restored classic Ford Galaxie.
1. Finding Rare and Discontinued Parts
One of the most significant challenges in restoring a classic Ford Galaxie is locating original or reproduction parts. Some components may be rare, discontinued, or require customization to fit properly.
Solution:
- Search for specialized online retailers and auction sites that cater to classic Ford car enthusiasts. eBay, Hemmings, and Collectors Auto Supply are great starting points.
- Join Ford Galaxie forums, online communities, and social media groups where fellow enthusiasts share resources, advice, and parts for sale.
- Visit local swap meets, car shows, and vintage car clubs to network with other collectors and find parts.
- Consider custom fabrication or modification for hard-to-find parts, but ensure that the alterations do not compromise the car’s integrity or value.
2. Addressing Rust and Corrosion
Rust and corrosion are common issues with vintage cars like the Ford Galaxie. Restorers need to tackle rusted body panels, floor pans, and other structural components to ensure the vehicle’s integrity.
Solution:
- Assess the extent of rust damage and decide whether to repair or replace affected parts. Minor surface rust can often be treated and repaired, while extensive rust damage may necessitate panel replacement.
- Employ sandblasting, chemical rust removal, or electrolysis to remove rust from metal surfaces.
- Protect your restored Galaxie from future rust by applying rust inhibitors, undercoating, and using high-quality paints and sealants.
- Store the vehicle in a dry, climate-controlled environment to minimize moisture and humidity exposure.
- Rebuilding or Replacing Mechanical Components
3. Rebuilding or Replacing Mechanical Components
Over time, mechanical components can wear out or fail, requiring repair or replacement. Restorers may need to rebuild or replace the engine, transmission, suspension, and brakes to ensure the car is safe and functional.
Solution:
- Consult restoration guides, service manuals, and online tutorials to learn how to rebuild or replace essential components. For example, check out this video about the 1962 – 1963 Ford Galaxie Shop Manual –
- Seek the help of a knowledgeable mechanic or restoration expert experienced in working with classic Ford cars.
- Regularly maintain your restored Galaxie to prolong the life of its mechanical components, including routine fluid changes, inspections, and tune-ups.
4. Resolving Electrical Problems
Wiring and electrical components in older vehicles like the Ford Galaxie can deteriorate or fail over time, leading to potential safety hazards or performance issues. Restorers may need to rewire the car, replace components, or update the electrical system to modern standards.
Solution:
- Inspect the wiring harness and replace any damaged or corroded wires, connectors, and fuses.
- Update the charging system, lighting, and ignition components with modern, more reliable alternatives when appropriate. Consider upgrading to an electronic ignition system or LED lighting for improved performance and safety.
- Consult with an automotive electrician or restoration expert for guidance on complex electrical issues.
5. Restoring Upholstery and Interior Components
Vintage interiors can become damaged or worn over time, requiring restoration or replacement of upholstery, carpeting, and other interior components.
Solution:
- Assess the condition of the interior components and determine if they can be repaired or if replacement is necessary.
- Source original or reproduction upholstery materials, carpeting, and trim pieces that match the original specifications of your Ford Galaxie. Online retailers, restoration shops, and vintage car forums can be helpful resources.
- If you’re not skilled in upholstery work, consider hiring a professional upholsterer experienced in restoring classic car interiors.
- Preserve the restored interior by using protective covers, avoiding exposure to direct sunlight, and maintaining a clean and dry environment.
- Tackling Paint and Bodywork
6. Tackling Paint and Bodywork
Restoring a Ford Galaxie’s paint job and bodywork can be time-consuming and expensive, especially if there is extensive damage or if the owner wants to achieve a high-quality finish.
Solution:
- Evaluate the condition of the body and assess the extent of any damage, dents, or imperfections that need to be repaired before painting.
- Use a high-quality paint system and follow proper surface preparation, priming, and painting techniques to achieve a durable, long-lasting finish.
- Consider hiring a professional auto body and paint shop with experience in classic car restoration if you lack the necessary skills or equipment.
- Keep the finished paint in top condition by using car covers, waxing regularly, and storing the vehicle in a dry, climate-controlled environment.
7. Finding Expertise for Vintage Ford Galaxie Restoration
Not all automotive professionals have experience working with vintage cars like the Ford Galaxie, so finding knowledgeable mechanics, body shops, or restoration experts can be challenging.
Solution:
- Network with other classic Ford enthusiasts through forums, car clubs, and social media to seek recommendations for skilled professionals in your area.
- Attend car shows, vintage auto events, and swap meets to meet other Galaxie owners and discuss their experiences with local experts.
- Research and interview potential mechanics, restoration shops, or upholsterers to ensure they have the necessary experience and knowledge to work on your classic Ford Galaxie.
8. Managing Time and Costs
Restoring a vintage car can be a long, labor-intensive, and expensive process. Owners should be prepared to invest significant time, effort, and resources into the restoration project.
Solution:
- Develop a realistic budget and timeline for your restoration project. Account for potential cost overruns and unexpected delays.
- Prioritize tasks and focus on critical safety and mechanical components before moving on to cosmetic aspects of the restoration.
- Break the project into smaller, manageable stages to make it less overwhelming and allow for steady progress.
- Consider taking on some of the restoration work yourself if you have the skills and knowledge, but be prepared to consult or hire professionals for more complex tasks.
Conclusion:
Restoring a classic Ford Galaxie is a rewarding journey that allows you to preserve a piece of automotive history and enjoy a timeless, iconic vehicle. By understanding and addressing the challenges associated with the restoration process, you can overcome obstacles and achieve a successful outcome. With patience, persistence, and the right resources, your Ford Galaxie will be a stunning reflection of its former glory, ready for the open road and many admiring glances.
Which Antifreeze is Right for Your Vehicle?
Vehicle antifreeze used to be simple. You went to the parts store, picked up a jug of green liquid, mixed it 50/50 with water and poured it into your radiator. But now with yellow, orange, blue, pink and red antifreezes covering the shelves, it can be hard to know what to get. This overview will help you make the right choice for your vehicle.

Types of antifreeze
For all the available colors, there are three basic types of antifreeze. Traditional green antifreeze uses Inorganic Acid Technology (IAT) and is fortified with silicates and phosphates such as ethylene glycol (EG) or propylene glycol (PG), which prevent acid buildup and prevent metal corrosion. This needs to be replaced every three years or 36,000 miles, as the additives are eventually consumed.
As for modern antifreezes, Organic Acid Technology (OAT) coolant is red or orange, is silicate- and phosphate-free, and is good for up to five years or 150,000 miles. However, it can only be used with aluminum radiators. The newest formulation is Hybrid Organic Acid Technology (HOAT), which uses nitrates to combine IAT and OAT coolant. This “universal” antifreeze is yellow or red, and can be used in most vehicles from 2002 or later. (Any antifreeze color other than the ones mentioned is the result of a company trying to make theirs look proprietary.)
Which one should I use?
When replacing antifreeze, the safest thing to do is use what came with the vehicle, which can be found by consulting your factory manual. It is sometimes possible to replace one type with another, but you’ll need to research your vehicle first – for example, using OAT antifreeze with a copper or brass radiator will cause extensive corrosion. If you are changing your antifreeze type, make sure to completely rinse out the old coolant first.
As for topping up with a different type of antifreeze, nothing disastrous will happen immediately. However, this combined antifreeze can eventually become gel-like and clog up the cooling system. It will also reduce your antifreeze’s lifespan to whatever the lower number is of the two types. If you ever find yourself in an emergency situation where you have to mix, make sure to completely change the coolant as soon as possible.
How to Learn Car Restoration
Car restoration is a leading passion among many vehicle enthusiasts – and is a booming industry in its own right. But how, exactly, does one learn the process of rebuilding an automobile? This guide from The Motor Bookstore offers a number of tips and places to look for information as you pursue your newest hobby.
- Start small. Get a cheap-but-working clunker from a junkyard or auto auction that you can use to learn the basics – oil and filter changes, brake systems, etc. You’ll gain a lot from working on your own vehicle, and if you do make any big mistakes, they at least won’t be expensive ones.
- Get help from – and help – your friends. You’re sure to have at least one or two friends or family members in your circle who likes working on cars, and they usually have car-minded friends as well. Offer to help out on their next project, and consult them whether you run into a roadblock on your own project. Car enthusiasts are a tight-knit community, and they’re almost always happy to share knowledge.
- Read books. There are a number of automotive repair manuals available for vehicles of all types. Aftermarket DIY manuals such as Haynes, Bentley and Chilton Total Car Care are good for beginners, while factory OEM manuals get down to the nitty-gritty for advanced mechanics. If money is tight, check your local library for books and other resources.
- Unleash the power of the World Wide Web. There are oodles of internet resources available for people interested in vehicle restoration. YouTube is loaded with how-to videos that can teach you about everything from engines to transmissions. Online vehicle forums and blogs also offer a wealth of information, including build threads, step-by-step guides and tips – often with pictures included. Just remember to use your discretion and disregard anything that’s obviously wrong.
- Take classes. If you’re looking for formal training, many local vocational schools or community colleges offer inexpensive classes on various aspects of vehicle mechanics. Some schools, such as Lincoln Tech and McPherson College, even have degree and certificate programs that include extensive hands-on experience.
Toyota Camry Head Light Bulb Change Guidance Tips
The Toyota Camry is the best-selling car in North America, and one of the biggest reasons is that they’re easy to maintain. Oil changes, filter changes and other basic maintenance are easy to do in your own garage or driveway. Changing head light bulbs is no exception, and with this guide, you’ll learn how to do it without a trip to your mechanic.

Head light bulb guide
For the 2007-2016 generation of Toyota Camrys, you’ll need H11 bulbs for the low-beam head lights, and 9005/HB3 bulbs for the high-beams. Toyota Camrys made from 2000-2006 use 9006/HB4 low-beam head light bulbs and 9005/HB3 high-beam bulbs. Older Camrys use 9003/H4 bulbs. Consult your vehicle manual for more information about how to change head light bulbs.
Change the head light bulbs
After popping the hood, locate the low- or high-beam headlight that needs to be changed. Remove the wire harness by pressing the small lever on the front of the harness and sliding it off the head light retaining clip on the base of the bulb. Carefully turn the head light bulb 1/8- to 1/4-turn counter-clockwise, then pull the bulb straight out of the head light assembly. (You’ll want to recycle the old bulb, as throwing it out increases the risk of it breaking and releasing harmful substances.)
Wearing a clean pair of cotton gloves to prevent fingerprint smudges, insert the new bulb directly into the head light assembly. Slowly rotate the bulb clockwise until it’s secure, then slide the wire harness over the retaining clip until it clicks into place. Test the new bulb by turning on your head lights and aiming your vehicle at a garage, house, or other wide surface. Close the hood, and you’re all set.
Change both, or just one?
While some people just change the burned-out bulb, it’s usually better to change both at the same time. Changing bulbs in pairs ensures that both are the same intensity, and you won’t have one brighter than the other. Furthermore, bulbs have the same general lifespan – so if one goes out, the other usually isn’t far behind, making the safe play the good one.
The 10 Best Cars to Restore

There are seemingly endless car restoration options available for newcomers and experienced mechanics alike. But some cars stand out from the pack, whether for mechanics, available parts, resale value or available support. The Motor Bookstore presents our picks for the 10 best cars to restore:
- 1964-1968 Ford Mustang. With its simple mechanics, widely available parts and large support network, the first-generation Ford Mustang remains the king of car restorations and is a great first-time project.
- 1967-1969 Chevrolet Camaro RS. First-generation Camaros are known for being reliable, fun to drive and easy to work on. These cars share parts with same-year Pontiac Firebirds, and you can even order new bodies.
- 1971-1972 Pontiac GTO. While all GTOs are great restore candidates, the later second-generation models are more affordable. Interest from collectors is increasing for this classic car, giving it a high resale value.
- 1968-1970 AMC AMX. This muscle/sports car hybrid was one of the best handling cars of its era. Less than 20,000 were produced, so parts may be hard to find, but the final product is sure to have a buyer.
- 1972-1973 Dodge Challenger. These luxury muscle cars sport an appealing look and a growing supply of available parts. While they can be customized, they have far more value if restored to original factory standards.
- 1928-1931 Ford Model A. Affordability, easy mechanics and a large amount of experts make this a good car for a first-time restore. The amount of available performance parts is also increasing.
- 1951-1954 Packard. Relive the 1950s with one of the best-built cars of the decade. The body and trim may be a little difficult to find, but lots of help is available, and they’re an easy sell if restored correctly.
- 1978-1982 Chevrolet Corvette. The third-generation Corvette has less power than its predecessors, but is smoother and more reliable. There are dozens of companies selling reproduction parts and modern upgrades.
- 1963-1965 Buick Riviera. This two-door sport coupe competitor to the Ford Thunderbird is fast, powerful and well-designed, and more and more companies are producing replacement parts.
- 1982-1993 Chevy S-10. If you’re looking for something different, compact pick-up trucks are cheap, reliable and can be endlessly modified. In addition to the S-10, the first-generation Ford Ranger is a good restore option.
If you have restoration photos of any of the above cars that you would like featured in this article, please send the photos via comments or directly to support@themotorbookstore.com. Thank you.
Automotive Air Conditioner Recharging Steps, Tips and Strategies Overview
When it’s 95 degrees on a July afternoon, the last thing you need is for your vehicle’s air conditioning vents to blow warm air. Tiny amounts of refrigerant leak from your A/C system lines over time, and this eventually adds up to subpar cooling. With this step-by-step guide, you’ll learn how to recharge your existing A/C system and restore great cooling performance.

WHAT YOU’LL NEED: 1-2 12 oz. cans of R-134a refrigerant (for vehicles 1994 and newer); one refrigerant dispenser with pressure gauge and trigger; one pair of goggles
- After putting on the goggles, insert one can of refrigerant into the bottom of the dispenser and screw it in until tight.
- Locate the fill port for the A/C system. This is usually on the left side of the engine bay, protruding from the firewall, and has a small plastic lid with an L printed on top. Remove the lid.
- Attach the dispenser to the fill port. In rapid succession, grab the connector on the end of the hose; lift the outer sleeve of the connector; squeeze the dispenser trigger for two seconds (to purge air); press the connector firmly on the port; then release the outer sleeve, connector, and trigger in that order.
- Verify your vehicle’s A/C compressor is working. After starting the engine and turning the A/C fan to max, locate the pulley. If the center of the pulley isn’t spinning, add half a can of R-134a; if it still isn’t spinning, you’ll need to bring the vehicle to a mechanic.
- Locate the minimum and maximum pressure readings for the vehicle in your factory manual. Use the pressure gauge on the dispenser to get a current reading.
- To recharge the system, squeeze the trigger for 5-10 seconds while slowly tipping and shaking the can. Wait 30 seconds for the pressure to equalize before check your reading again. Repeat as needed.
- To change cans, turn the current can upside down, then hold the trigger for 30 seconds before releasing. Unscrew the empty can and screw on the new one.
Once your pressure reading is comfortably within the minimum/maximum range, disconnect the dispenser and re-cap the fill port.

Battery versus Alternator: Which One is Bad?
Batteries and alternators go together like peanut butter and jelly, with the battery starting the vehicle and the alternator charging the battery. But if the vehicle suddenly won’t start, how can you tell which one has gone bad? The Motor Bookstore looks at how to test your battery and alternator so you’ll know which needs to be replaced.

The battery
You should always start by checking the battery, because this is easier both to check and replace. An early sign your battery is going dead is if you hear a low whining sound when you start the vehicle. If it’s gotten to the point where it won’t start, there are a few diagnostic options. After jump-starting the vehicle, let it run for 20-30 minutes; if the vehicle won’t start again after turning it off, the battery is no longer holding a charge.
Some vehicles have a gauge that shows if the battery is working even when the vehicle is off. A dim, flickering light means something is using battery power. If this happens, turn off all accessories, clean any corrosion off the terminals, and try to charge the battery again. You can also use a voltmeter to check the battery voltage. This should be around 12.6 volts when the vehicle is off, and 14-15 volts when the vehicle is running.
The alternator
There are multiple signs your alternator could be failing. If your interior lights fade as the car runs, it’s a sign the alternator isn’t charging the battery. Another sign is that the lights shine brightly when you speed up, but fade when you slow back down. You can sometimes hear a growling sound right before the alternator goes out, and the smell of burning rubber or hot wires from the engine might be the alternator overheating.
Two fairly reliable alternator tests can be done at home. If the battery is adequately charged, start your car, then disconnect the positive terminal on the battery. The car shutting off likely means an alternator problem. If the car won’t start, jump-start it, then disconnect the jumper cables. As with the first test, the car dying immediately is a good indicator the alternator is at fault.
Hopefully, the suggestions above will provide you with the strategies and techniques to determine if your battery versus alternator is bad. If not, you might consider one of our DIY car electrical manuals for additional expert advice.
How to Tell if Your Fuel Pump is Bad – Tips and Strategies
Having a full tank of fuel doesn’t do any good if it can’t get to your vehicle’s engine, which is where your fuel pump comes in. But like any mechanical part, a fuel pump won’t last forever. These tips and warning signs will help you determine if the fuel pump needs to be replaced on your vehicle.

- You hear a whining or howling noise from the fuel tank. Electric fuel pumps make a clicking or buzzing sound when they’re functioning normally. Whining, howling and whirring are early signs the pump is going south.
- Your vehicle suddenly “surges” when moving at consistent speed. You’re driving at 35 mph, and your vehicle suddenly speeds up to 40 mph even though you didn’t press any harder on the gas pedal. It could be ghosts in the machine – or a sign your fuel pump has irregular resistance within the motor.
- You experience a loss of power when accelerating or under stress. Even a balky fuel pump can be sufficient when moving at a constant speed on flat roads. But if you lose power when accelerating, going up hills or hauling loads, your engine isn’t getting the fuel it needs.
- Your vehicle suddenly becomes a gas guzzler (or more of one). When the relief valve on your fuel pump doesn’t open, more fuel goes into the engine then is necessary. If you suddenly need to stop for gas a lot more often, this could be why.
- Your vehicle doesn’t start or has trouble starting. This is the endgame of a bad fuel pump – when it can’t even get enough fuel to the engine to properly start it.
There are two ways to test your fuel pump if you suspect it’s bad. First, put your key in the ignition and turn it to the On or Accessory positon (without starting the car); you should hear the pump start up. If it doesn’t start, attach a fuel pressure gauge to the pressure valve near the engine, and compare the reading to the recommended pressure in your OEM, Clymer, Haynes or Chilton Total Car Care manual. If the pressures are significantly different, it may be time for a new pump.
Vehicle Service Manuals: OEM vs. DIY Aftermarket
So you’ve decided to learn more about your vehicle, and are looking for the best vehicle service manuals you can find. But where do you start? You’d like to get an original factory manual – but is a less expensive aftermarket DIY manual from Haynes, Chilton, or Clymer exactly what you need? The Motor Bookstore examines the upside of each.

OEM/factory manuals
OEM, or “original equipment manufacturer” manuals, offers the most information you can find about your vehicle. They’re written by the company that built the vehicle and are aimed at professional technicians and advanced mechanics. Different types of OEM manuals can include service manuals, wiring manuals, unit repair manuals and owner’s manuals. These manuals are usually hundreds and even thousands of pages. While they can be expensive and harder to find for older vehicles, and the sheer amount of information can be overwhelming for newcomers, they’re an invaluable resource to have.
DIY/aftermarket manuals
Chilton, Haynes and Clymer are often referred to as “do it yourself” or “aftermarket” manuals. These books usually cover one or two vehicles spanning multiple years. (For example, one Haynes manual covers the Honda Accord from 2003-2012 manual and the Honda Crosstour from 2010-2014.) As a result, there is typically less information about each specific vehicle, but they do include additional instructions, photographs and illustrations for novices.
Chilton has been publishing automotive magazines and manuals for more than 100 years, and is known for their Chilton Total Care series. Haynes has been around for almost 60 years and publishes automotive manuals, motorcycle manuals and techbooks. Manuals from each are typically a few hundred pages and cover various maintenance and repair procedures. Chilton manuals also include engine torque specifications for those looking to rebuild engines. Clymer manuals focus on power sport vehicles such as motorcycles, ATVs and snowmobiles. Their big selling point is that each machine is completely disassembled and reassembled during the writing process, resulting in more detailed instructions.
Final thoughts
If you’re a novice mechanic, a DIY manual from Chilton, Haynes or Clymer is a great starting point, and their instructions and diagrams will be helpful on early projects. More experienced mechanics will want to make the additional investment in an OEM manual aimed at their specific vehicle.
Things to Consider Before You Attempt to Rebuild an Engine
Rebuilding an engine can be a great way to keep your favorite vehicle on the road, and also gives you the satisfaction of doing your own repair work. But it can also be a challenging, time-consuming task and isn’t for everyone. Whether you’re a first-timer or an experienced mechanic, consider the following questions before you attempt an engine rebuild:

Does the engine really need to be rebuilt?
There are three primary reasons to rebuild an engine: loss of compression, excessive oil consumption and excessive oil clearances. But like any symptom, there are multiple potential causes. For example, excessive oil burning could be caused by stuck oil rings – or you could just need a $6 PCV valve. Therefore, it’s important to thoroughly test your engine first to make sure a rebuild is necessary.
Does it make sense to fix it?
This is ultimately a personal choice and depends on factors such as the overall vehicle condition, how much longer you want to keep it on the road, and the cost of a new engine or vehicle versus a rebuild. Generally speaking, if you think the vehicle will give you at least 3-5 more good years – without any other major repair bills in that time – then a rebuild is a good choice.
How much time will it take?
Time spent on rebuilding an engine is time you won’t be able to use the vehicle. A relatively simple ring and valve job can be completed in a week of evenings and weekends, but if the cylinders need to be bored or the block needs to be decked, you could be talking about months. If you don’t have easy access to other transportation, the expense of a new engine could be worth the time saved.
Do you have access to all the tools you need?
Even the simplest rebuilds require a lot of tools. Most DIY mechanics have access to torque and socket wrenches, electric drills and oil pans. But far fewer have cylinder bore honing tools, piston ring compressors, or silicone gasket makers lying around. If you don’t have these tools, you’ll need to buy them, rent them, call in a favor to a friend, or pay for a machine shop to do more of the work. The best tool that you must have is one of our DIY Engine Rebuilding Books which we offer at the lowest price possible with Free Shipping in the continental U.S.


Search Our Blog