Author Archives: Mike Hornok
AAA isn’t the only show in town these days. Thanks to a competitive market and a determination to draw in consumers, everyone and his mother is offering roadside assistance programs, including dealerships, cell phone providers, auto clubs and credit card companies. This is actually great news. Nothing ruins your day more than being stuck on the side of the road with a flat, a stalled engine or being in the middle of nowhere with an empty tank.
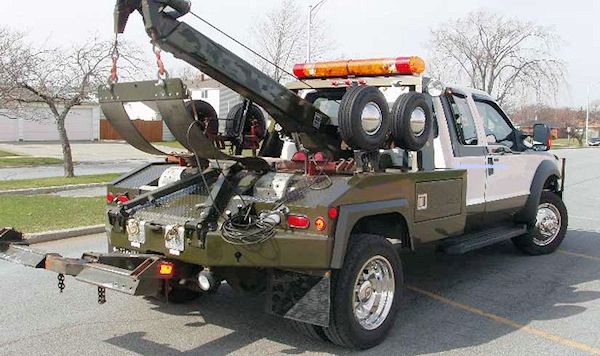
Now, the Motor Bookstore is about empowerment for car owners. Our library is filled with manuals about how to save money and getting yourself out of vehicular jams. But even we’d admit our best Haynes manual can’t help in every situation. That’s why everyone should look for the best roadside assistance program.
But, considering the market, which one? Your dealer or triple-A? The one that costs less but has the tendency of leaving you waiting for hours in a pouring rain? The affordable program that discounts services, i.e., your tow is only going to cost half the normal price? The full service program that may require financing but will bring coffee and donuts?
Always remember, the plan offered is going to be the best roadside assistance program. It’s the salesman’s job to convince you of that. But here are a few things to keep in mind when negotiating the murky waters.
- Make sure you understand the circumstances in which your program kicks in. There are plans that won’t offer services in bad weather. One may have a completely free service and another will want payment for any service on top of membership fees. Know what you want versus what they’re offering. And do not be afraid to walk away from the table. It’s your money, your decision and there are plenty of options.
- When it is time to look into a program, find out if you already have options. Ford provides a range of roadside assistance services with new purchases, including filling an empty tank. American Express offers emergency services to all its cardholders. Contact your credit card company or cell phone provider. Talk with the manufacturer.
- Decide what you need and be prepared to pay for it. If you want full roadside assistance, it’s going to cost more than a company offering partial services. Another company may offer a limited number of times they’ll come out before charging. One may not do lock-outs and another will charge extra for extraction from mud and snow. Keep it affordable, but be aware the more comprehensive the package, the more you’re going to pay for the best roadside assistance program.
- Look for extras. Focus on what the service offers you as a driver, but there can be some nice incentives, like discounts on hotels.
The web is, of course, information central. Find out what the Better Business Bureau is saying about a service, go to the forums (be fair, look at reviews and complaints; remember, people are more than happy to vent while the satisfied are more likely to stay mum) and talk with authorities like the guy you trust to work on your car.
The Toyota Corolla. Believe it or don’t, even in a world of Jags and BMWs, it’s one of the most popular cars in the world. In 1997, the model was the globe’s best selling vehicle, taking the place of the perennial VW Beetle. In July 2013, there were 11 generations of the Corolla and over 40 million people were enjoying them.
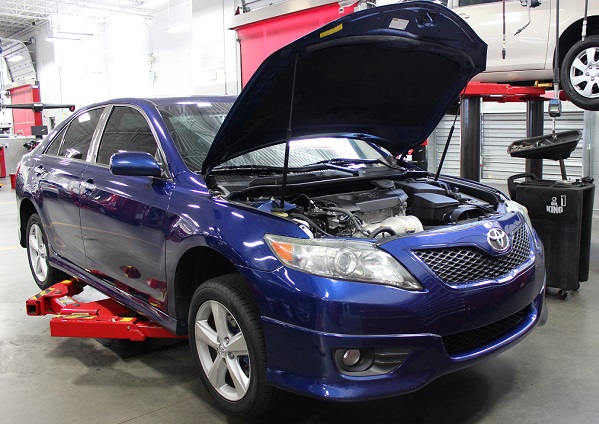
It’s a dream machine for anyone interested in a sleek, well-designed and compact ride with exceptional fuel economy and a sizable cabin. Since the mid-1960s and throughout its many adjustments, the Corolla remains an affordable and reliable investment.
Like any car, Toyota Corolla repair and maintenance is a must. The cost and time that goes into the process makes a lot more sense than the cost and time that will be required if you don’t. The repercussions of not regularly managing your car is going to cost you, devalue your Corolla and, at worst, result in one of the thousands of accidents that happen every year because a driver isn’t paying attention to the car’s needs. This includes:
- Oil changes
- Air pressure and tire rotations
- Replacement of timing belts
- Regular brake checks
- Regular PCV maintenance
- Changing of filters and spark plugs
The irony is, with a little forethought and preparation, Toyota Corolla repair and maintenance doesn’t have to be time consuming or expensive. Here are some top tips for keeping your Corolla running at peak performance without a lot of fuss and muss.
- Don’t just keep the manual in the glove component, keep it where you can read it. The manufacturer’s manual is the ultimate guide for Toyota Corolla repair and maintenance. It has a guide for routine maintenance and scheduling. It provides details for the car’s operation that can avert problems down the line.
- Online sources like PartsGeek and AutoBarn can save money. Should you take your Corolla in for work, find out if you can buy your own parts before they do any work. Many shops mark-up parts, even when they have them in-store. By investigating the matter yourself, you get a better idea of what you can do to save money.
- Have a good Toyota Corolla repair manual in the garage. These books are engineered by pros and make great resources for everything from having intelligent conversations with your mechanic to doing-it-yourself.
- The best way to protect your car is diligence. By adhering to regular check-ups, you have greater confidence your vehicle is safe to drive and you greatly minimize problems. And by educating yourself, you put yourself in a position to do a lot of the work yourself. You never know, you could in time build up the confidence to do more complex work.
- Try and keep essential equipment in the car at all times. You’d be surprised how much people end up spending on a jump because they don’t have cables. We once avoided a ticket because we were able to replace a broken taillight on the spot. Check out LifeHacker’s list of items you should always have in your trunk.
Get the most out of your investment by taking complete control of your Toyota Corolla repair and maintenance. You extend the vehicle’s life span and your bank account.
5 Things to Remember For Your 1st Gen Camaro Interior Restoration
Believe it or not, the Camaro was originally and quickly designed as competition to the Mustang and was the automaker’s response to the Baby Boomer’s personal coupe revolution. To everyone’s surprise, the result was a revelation. A car classically proportioned and lean, muscular without being brash, with an European flavor but obvious American expression. No other car before — or since — has had quite the aesthetic as the first generation Camaro.

If you’re one of the lucky few with keys to a first-gen Camaro, you’re probably spending time keeping it classy, especially that cabin. From radios to sun visors and sport seats, you want that interior to shine.
There are two basic projects for the first-gen Camaro interior restoration. For the purist, there’s the original restoration, which is the process of meticulously returning the cabin to the manufacturer designed state. And for the owner that likes to put a personalized spin on everything, you have the custom restoration. This can include everything from Cipa mirrors to Sirius radio. Whichever you choose, this is a project you want done right.
If you’re in the midst of a Camaro interior restoration, looking at the possibility of performing one or just like pretending you might have the opportunity one day, here are five top tips for getting it right.
- While upholstery can be found throughout the interior, many elements are molded plastic, vinyl or painted. Remember that cars are like houses. Interior and exterior paints are not the same. Do a little research on car paints because:
- They can have different levels of gloss.
- Gloss levels are important because areas on the dash need to combat glare while other surfaces may have slightly higher use of gloss to accent color.
Take a look at this photo below.. While the colors appear the same, trust that the reds are different to accommodate each specific surface.

- Do you know what your hot rings are and how to use them? These instruments attach listing strips to an upholstery’s underside. These tools leave that almost three-dimensional, tight look we love so much. Using them requires care because haphazard application can easily crush them. Familiarize yourself with these and other tools before putting them to use.
- Before and during any process, take pictures. These will become handy, allowing you to track the disassemblies while ensuring reassemblies go smoothly. You should bag, group and label as you work as well. Between the pictures and organization, you minimize confusion and the possibility of wondering why you have those dreaded extra parts.
- Take a look at a Camaro Interior Kit. If you’re planning an original Camaro interior restoration, one of these is guaranteed to save you a lot of time. They include panels for doors and rear quarters, headliners, sun visors, carpets and seat covers engineered to match the 1967–1969 models. They come in standard, deluxe and Sport R options.
- Take advantage of the resources you can find at Camaro Restoration & Service Guides – The Motor Bookstore. There’s practical material regarding Camaro service and maintenance, restoration, overhauls and more. Every publication comes from a source respected for manuals written with both the novice and professional in mind.
With these tips and a good Camaro interior restoration guide on deck, rest assured your timeless car’s interior will be as impressive as the engine’s powerful performance.
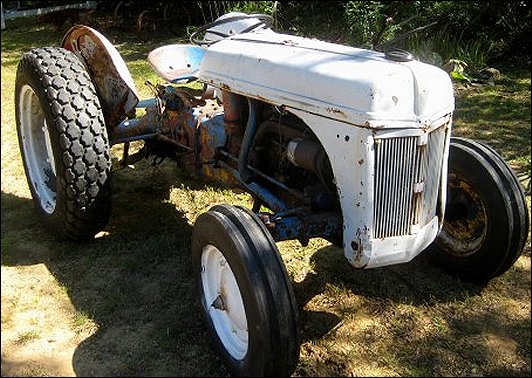
It is hot and dry, perfect weather for cutting hay. However, Mr. Murphy of Murphy’s Law has been busy on your farm, and your tractor has problems. You cannot get important work finished until the tractor is fixed, and they tell you at the tractor shop that it will be at least three weeks before they can get to your repair. So, in the spirit of farmers everywhere, it is time to do-it-yourself.
Of course, the idea of doing your own farm tractor repair may be intimidating at first. There are so many parts and pieces, and you may wonder if you will just make things worse by trying it on your own. However, you have the advantage of living in the information age. Many times, by using the World Wide Web even a novice tractor mechanic can figure out the problem, search for repair tips on sites like YouTube and online forums, and order the tractor repair manual for almost any tractor here at The Motor Bookstore.
Identify the Problem
Because tractors are generally less complicated than other kinds of vehicles, diagnosing the problem may be simpler than you might think. If you have a DIY manual, you may be able to look up the problem and find a few possibilities. Sometimes, neighboring farmers may be able to help you figure out the problem, and if that fails, you can also Google the issue and figure out what has gone wrong.
Have the Proper Tools
To work on your tractor, you will definitely want to have the correct tools. To turn many of the nuts and bolts on a tractor, you probably will need a socket set that is much larger than what people typically have on hand. Extra-large wrenches are also handy. Additionally, a large can of spray oil, such as WD-40 can make turning grime-encrusted bolts just a little easier.
When you buy these tools, try to get the best quality that you can afford. You will save little money if your cheap wrenches break, and when inexpensive sockets slip on the bolts that they are supposed to turn, you will wish that you had invested a little more cash in your tools. Quality tools will make every tractor repair go a little bit more smoothly.
Call a Buddy
Many tractor repairs will take more than one person to perform. You may need someone to help you remove heavy parts, hand you tools, and figure things out. Not to mention that it is always a good idea to have two people trying to remember how things went together in the first place.
Look to the Future
Even if your farm equipment is currently working properly, on a farm, you cannot take that for granted. There will come a day when rain is in the forecast, and 75 acres of fabulous alfalfa hay is lying on the ground waiting to be baled. Farming is your livelihood, and you need to plan for the future and be prepared for breakdowns by having farm tractor repair manuals on hand for all of your machinery, proper tools on in the tool shed, and the willingness to dive in and attempt your own farm tractor repair.
Invest In Your Farm
Buying tools to work on your tractor and DIY or OEM Factory Reprint Manuals may seem expensive. However, by purchasing these items, you are really investing in your farm. By preparing yourself to perform your own farm tractor repair, you will not have to deal with frustrating delays while you wait for the repair shop to tackle your repair. Additionally, you will save money, since you will not have to pay a mechanic to repair your tractor.
After you have made a few repairs, working on your tractor will not seem so scary, and you will get a better idea of how things work. Use these tips to get started in the world of DIY tractor repairs.
The Motor Bookstore recently reviewed the 101 Sportbike Performance Projects book, published by Motorbooks and written by Evans Brasfield. Towards the end of this review we provide our independent opinion
There is no more powerful feeling of freedom than driving down the road on your own sportbike. Modifications on these masters of speed are common, but require an expert or access to 101 Sportbike Performance Projects: Suspension, Fuel, Injection, Exhaust, Clutch Brakes, etc.
There are many projects you can do to make the sportbike customized to your tastes. These projects can change the look and feel of the bike and provide boosts to performance and even longevity. Without a resource like 101 Sportbike Performance Projects, you’d be hard pressed to do them on your own unless you had an intimate knowledge of the bikes.
It outlines everything from simple everyday maintenance projects like oil changes and chain replacement to getting your hands dirty with fuel injection tuning and clutch replacement. If you’re a weekend mechanic or an amateur gearhead that loves to tinker, then the projects in the book are for you.
Why is this book the most trusted resource on sportsbike projects? You can thank writer Evans Brasfield for that. He’s a motorcycle journalist and former editor of Sport Rider and Motorcycle Cruiser magazines. His years of experience not only covering sportsbikes, but also working on them, give him a unique knowledge and perspective.
The book’s clear and concise writing with pictures and step-by-step instructions through each of these projects are designed to keep your bike on the road and at peak performance. Don’t let your local mechanic charge you thousands of dollars for projects you can do in your garage…but only if you have 101 Sportbike Performance Projects.
The Motor Bookstore rates this book 4 out 5 stars![]() .
.
You can purchase this book on sale here at: The Motor Bookstore.
Riding season is on the horizon. And you’re pumped. You’re going to get your hog out and get back to doing what you’ve been itching to do all winter. Ride like the wind!
Of course, we’re as excited as you are. But we also want to remind every rider that their priority is safety. Maybe you did everything right before storing your bike for those cold winter months, but now there’s spring motorcycle preparation tasks to tackle.
To get the best out of your hog for the next few months and to protect yourself and those on the road around you, here are six things you should do to prepare your motorcycle for riding season.
- Do a complete evaluation. Everything from lack of use to cold temperatures can impact your hog’s delicate fuel system. Replace filters as needed. Get your tank, fittings and lines examined. If you have fuel stabilizers, look for stratification or gunk. Drain tank and fuel lines. Make sure the carburetor’s good to go.
- If you haven’t been using a trickle or smart charger in anticipation of spring motorcycle preparation, you need to start. They help keep your battery strong while it’s stored without overcharging or damaging it. Otherwise, hopefully you’ve been going out there periodically and starting the engine just to keep it boosted. You should also check battery fluid levels and top off low cells.
- Check your owner’s manual for protocols regarding oil and filter changes. You may have done your part before the winterizing and storage process, but that doesn’t necessarily mean you’re good to go. Every motorcycle is different and procedures can be exacting. It’s a good idea to always change oil and filters at the same time.
- If stored properly — with the weight off the wheels — the tires are probably in good shape. Still, look for bulges, punctures, dents, stress marks, cracks and flat spots. Check air pressure for proper inflation with tire pressure gauges and make sure they’re filled to manufacturer recommended pressure. Tighten loose spokes and grease wheel bearings.
- Grab a copy of a motorcycle repair manual at The Motor Bookstore. They provide step-by-step instructions with detailed photos and diagrams. These manuals are derived from detailed projects where bikes are disassembled and reassembled with the entire process recorded and simplified for the reader. Designed for the layman and handy for the professional, they’re exceptional tools for any spring motorcycle preparation whether you’re riding a BMW, Harley, Kawasaki, Triumph, etc.
- Before you hit the road, give your insurance company a call and talk with an agent about your policy. Make sure there haven’t been any changes you should be aware of. If you’ve added equipment or any customization, you want to double check your coverage. If you’ve added any features that maximize safety, you might even be eligible for a surprise discount.
That first time you hit the road, your spring motorcycle preparation has to be absolute. As much you want it to look good, you want your bike to ride just as well. Go ahead and wipe it down and wax it up, but make sure the cogs and fixtures sparkle too. With a good hog repair and maintenance manual on the shelf to help you along, expect the coming riding season to be both safe and adventurous.
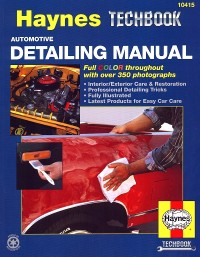
Many people think they must turn to a car dealer for car detailing to get the immaculate cleaning they want for their vehicle. Fortunately, this isn’t the case. With the right guidance and instructions, you can complete many of the same tasks on your own at home. All you need is some time and patience.

Wash in the Right Order
Washing your car in the right order will give you the meticulous shine you are looking for. Start with the wheels so you don’t splash water onto your already washed car body. Move on to the painted portions of the car, followed by the interior. Finally, wash the glass.
Use the Proper Drying Material
Some people use old cotton rags to dry their car, but this is a major mistake. Instead, choose waffle weave microfiber, which is the preferred fabric of the professionals. This material is gentler on your car’s finish and won’t create unseen scratches that affect the shine of the paint job.
Try Compressed Air
You may not have even considered it, but compressed air can be a great tool to use in car detailing. Blow the air into any tight spaces you can’t reach with a towel, such as behind the mirrors, in your taillights and behind any emblems on your car. This removes any water that may be trapped behind these features.
Vacuum Well
Cleaning out the interior of your car requires a good vacuum to remove dirt, crumbs and any other debris that may have built up in your car. Make sure to use all your attachments to eliminate the dust from your air vents and any other smaller crevices in your car.
Try a Light-Mist Wax
Instead of using a heavy wax, it is best to use a light-mist wax that sprays on. Apply it to a wet surface and dry with a microfiber cloth. This cloth will remove any dirt left behind in the washing process and will spread the protective coating on the painted surface.
Car detailing doesn’t have to cost you a lot of money. With these tips and strategies, you can perform the same service at home for much less. There’s no reason why you shouldn’t enjoy an impeccably detailed car whenever you want.
If you are interested in car detailing books, click here: The Motor Bookstore.
Have any detailing tips you use to keep your car in top-notch condition? Please feel free to share them with us in the comments.
Toyota’s Air Bag Recall Continues to Rock the Industry
Toyota Motor Corp. has definitely seen better days. The world’s largest and most dependable automaker has had to recall millions of vehicles around the world. Just this recent June the auto giant recalled close to 650,000 models in Japan alone. Some vehicles have been recalled twice for the same issue.

According to Toyota, a stunning portion of their cars feature airbag inflators that were engineered using defective parts. The inflators contain poorly constructed propellant wafers. This could create a rupture in the inflator causing the front passenger airbag to deploy abnormally if the vehicle were in an accident. Specifically, the front passenger air bag will burst because of the defective inflator. To date, a number of accidents and at least two fatalities have been linked to the faulty air bags.
This recall is tied to Japanese air bag maker Takata Corp., who have had to warn other auto manufacturers they too may have to initiate recalls. Worse, the Toyota air bag recall was aggravated by an error on Takata’s part. The company had issued incomplete serial numbers on their products. This stymied Toyota’s attempts to handle the problem swiftly. Toyota could only inspect vehicles based on serial numbers supplied by Takata, leaving out an untold number of models. Ironically, Takata is one of the world’s most respected manufacturers of auto safety equipment.
Takata has since struggled to stay ahead of these issues with quality control. Management had to publicly claim to U.S. regulators that they improperly stored chemicals and miscalculated explosive propellant components in their air bags. To magnify the problem, their ineffective record keeping greatly hindering the identification of which vehicles ended up with the potentially defective air bag inflators has been a major blow to their industry standing.
The Toyota air bag recall initially involved some 20 models, including the Lexus S 430, Tundra, Corolla, Sequoia and the Matrix. The manufacturer was looking at cars assembled between 2002 and 2004. Models recalled in Japan came off assembly lines in 2000–2003. The inflators themselves were manufactured in the early 2000s at Takata’s plant in Mexico.
The once unflappable Toyota is striving to retain its reputation. There have been other glitches in this matter that hasn’t helped make Toyota look good. One was the fact that some 380,000 vehicles were inspected but never received new air bag inflators. Though Toyota quickly offered to replace them, some saw the gesture as too little too late.
Toyota management is requesting anyone who has already had their inflators inspected but not replaced, do so again, as the automaker has decided to replace the parts on every model manufactured during the recorded periods. Toyota has instructed dealerships and authorized auto shops to replace the deflators in every vehicle covered by the recall, not just by (a) the serial number or (b) because the inflators turn out to indeed be defective. Toyota plans to perform the replacements in phases, both to avoid rushes and to ensure there are always enough parts. Toyota has been sending, and will continue to send, notifications to owners about the Toyota air bag recall.
The Toyota air bag recall has affected millions of drivers around the world and will likely continue to do so for some time. Any Toyota owner should definitely check to see if their vehicle falls under the recall guidelines. The quickest way to do so is through your VIN number and the following Toyota link. Enter your VIN number at this Toyota link to check whether your Toyota car or truck is impacted by this recall, or any other.
The Motor Bookstore has been servicing the automotive industry since 1997. We provide DIY and How-to literature to motorists so they can save money on their vehicle repairs. We sincerely hope that you take this Toyota air bag recall seriously!! Please don’t wait to receive a letter. Hit the link above and enter your VIN to verify whether or not your vehicle has been impacted. Your family’s safety may be at risk.
Kawasaki Vulcan 900 Repair Manual Review
The Motor Bookstore participated in a review of the Kawasaki Vulcan 900 Repair Manual, published by Clymer Manuals. The book review thoroughly covers the contents of the book from a do-it-yourself mechanic’s utilization perspective. The book review concludes with our overall rating of this Clymer repair manual as it relates to like products in its category, including price.
The Kawasaki Vulcan 900 Classic in all its variations has been considered one of the best two-wheeled motor vehicles on the road. First hitting the tarmac in 2006, it’s still a popular motorcycle choice today.
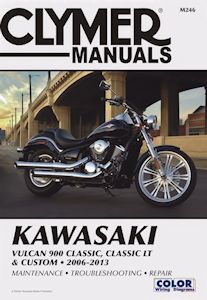
The Kawasaki Vulcan 900 Classic, Classic LT & Custom 2006-2013 is a comprehensive Kawasaki Vulcan 900 repair manual designed for the hogster that prefers keeping that bike up to par with their own greasy hands. It’s a vital resource for anyone that owns one of these beauties. It’s from Clymer Manuals, a provider of top vehicle guidebooks for the DIY motor enthusiast. The 2006-2013 Vulcan service manual is a meticulously detailed breakdown of the Vulcan’s basic maintenance, troubleshooting and everything in between.
The models covered in the Kawasaki Vulcan 900 repair manual are the Vulcan 900 Classic VN900B VN900BC, the Vulcan 900 Classic LT VN900D VN900DC and the Vulcan 900 Custom VN900C VN900CC. There are extensive colored wiring diagrams and carefully constructed chapters that are easily labeled for quick location of anything you would need to know. General Information even breaks down the manual’s organization, giving you a complete understanding of how to use it. The manual also opens with notes on safety, tools and supplies, the fundamentals of the electric system, storage and other specifications. It has complete instructions for overhauls.
From this point, the 2006-2013 Vulcan service manual goes into Troubleshooting. Again, taking the newcomer into account, it begins with something as basic as starting the engine. If you believe you already know your hog and can skip this, don’t. The chapter contains vital information on everything from engine lubrication to noises and clutch to gearshift leakage. It’s not unlikely there will be something here even the most seasoned rider won’t find new.
Kawasaki Vulcan 900 Classic, Classic LT & Custom 2006-2013 breaks down the chapters: Lubrication, Maintenance and Tune-Up; Engine Top End; Engine Lower End; Clutch, Transmission and Shift Mechanism; Fuel Injection, Emissions and Exhaust Systems; Electrical System; Cooling System; and that’s only the beginning.
The Kawasaki Vulcan 900 repair manual is filled with not only detailed instructions but a river of carefully labeled images. In chapter six, you will find a numbered list for installing a centrifugal clutch. You’ll see where and when to apply engine oil to threads, at what point to install the washer and instructions on measuring the insider diameter of the clutch drum bushing, alongside diagrams that can’t be misinterpreted with their easy to read markers.
The Kawasaki Vulcan 900 Classic, Classic LT & Custom 2006-2013 comes from Clymer Manuals. The 2006-2013 Vulcan service manual is only one of the resources you’ll find in their arsenal. It doesn’t matter if you’re into outdoor power, motorcycles, ATVs, tractors or snowmobiles. Clymer has a read at an affordable price that will make your life and experience easier. They also offer a service where, for a small fee, you can have unlimited access to their over 500 online manuals, a library that is constantly updated.
Clymer Manuals was recently purchased by Haynes Publishing Group and is headquartered in Yeovil, England.
The Motor Bookstore rates this book 5 out 5 stars![]() . The great thing about this Clymer manual is that it focuses on a single motorcycle make and model with only minor model variants. Some Clymer books cover way too many years and too many models. At 405 pages with hundreds of b&w photos and illustrations, we believe this manual will surely help the DIYer repair and service their motor bike themselves and save.
. The great thing about this Clymer manual is that it focuses on a single motorcycle make and model with only minor model variants. Some Clymer books cover way too many years and too many models. At 405 pages with hundreds of b&w photos and illustrations, we believe this manual will surely help the DIYer repair and service their motor bike themselves and save.
The Kawasaki Vulcan 900 Classic, Classic LT & Custom 2006-2013 Clymer repair manual is always on sale here at The Motor Bookstore, and we offer fast and free shipping to all customers within the continental United States.
Me, My Bev & Our Harleys
Me and the wife been riding hogs for nearly forty years. I’m on a classic V-Rod. Bought that baby in ’97. This genius decided to cross the engineering of a Porsche with a Harley. Ended up with the very first liquid cooled, fuel injected, overhead cam 60 degree Harley V-twin. My Bev was on a Switchback. This was only after finally getting her to admit that ’76 Shovelhead was done. It was her first hog and she wanted it to be her last. But after a bad fall, even she couldn’t deny that her beloved bike was ready for pasture. Even the best Harley-Davidson repair manuals couldn’t help. Still, she couldn’t bear parting with it. It’s sitting in our garage. For a long time, she went out there with a chamois to wipe it down.
We lived for those manuals. Keeping a hog can be an expensive hobby, especially if you choose to not know anything about them. I learned that the hard way. We not only had pretty much every Harley repair manual ever, I’d say we keep at least six of them somewhere on our hogs at all times. I read them the way some people read Entertainment Weekly and USA Today.
The only reason that Shovelhead lasted as long as it did was because I got my hands dirty. And after I told Bev it would be cheaper to just get a new bike, she started collecting and reading Harley-Davidson repair manuals. The Harley-Davidson Shovelhead FL, FXE, FLH, FXEF, FXB, FLHS, FXS, FXSB, FX, FXWG Repair Manual and the Harley Shovelhead, Evolution Repair Manual 1970-1999 became her bibles. I never admitted it, but she’d gotten pretty good at identifying issues and getting them fixed. And she was able to do it faster than I could. I always said it was because she had smaller, girl hands. She’d look me square in the eye and say something like, What don’t you go inside and get me a cold beer, missy? And I always did.
After I retired, we started a little side business out of the garage. Our (her?) reputation for getting hogs running spread. We once had a guy come all the way out from Butte to rebuild an old Big Twin from the 60s he’d found in a junk yard. That led to a bunch of Harley restorations. I can’t tell you how many times the wife and I clicked a couple of brews with a little giggle. We wondered what any of these people would think if they knew before starting any project, we went to one of the Harley-Davidson repair manuals and got pretty much everything we needed.
One morning I couldn’t sleep. Hadn’t slept well in a long time. Found myself out in the garage looking at that Shovelhead, glistening like brand new but unable to go three yards. Next thing I knew I was on one knee seeing what I could do. I kept referring to her Shovelhead Harley-Davidson repair manuals. I ended up tinkering with this and seeing what happened if I replaced that. It took a few months, but I got that thing running.
I only ride it once a week, when I visit my sweet Bev’s gravesite.

 Shop Store
 Google Plus